Approvals — How to use
Request, approve, and audit sign-offs directly on your monday.com board.
1. Install
- Open the app in the monday marketplace and click Install.
- Review the requested permissions and approve. Approvals requests only what it needs (read your boards and users; post updates and notifications).
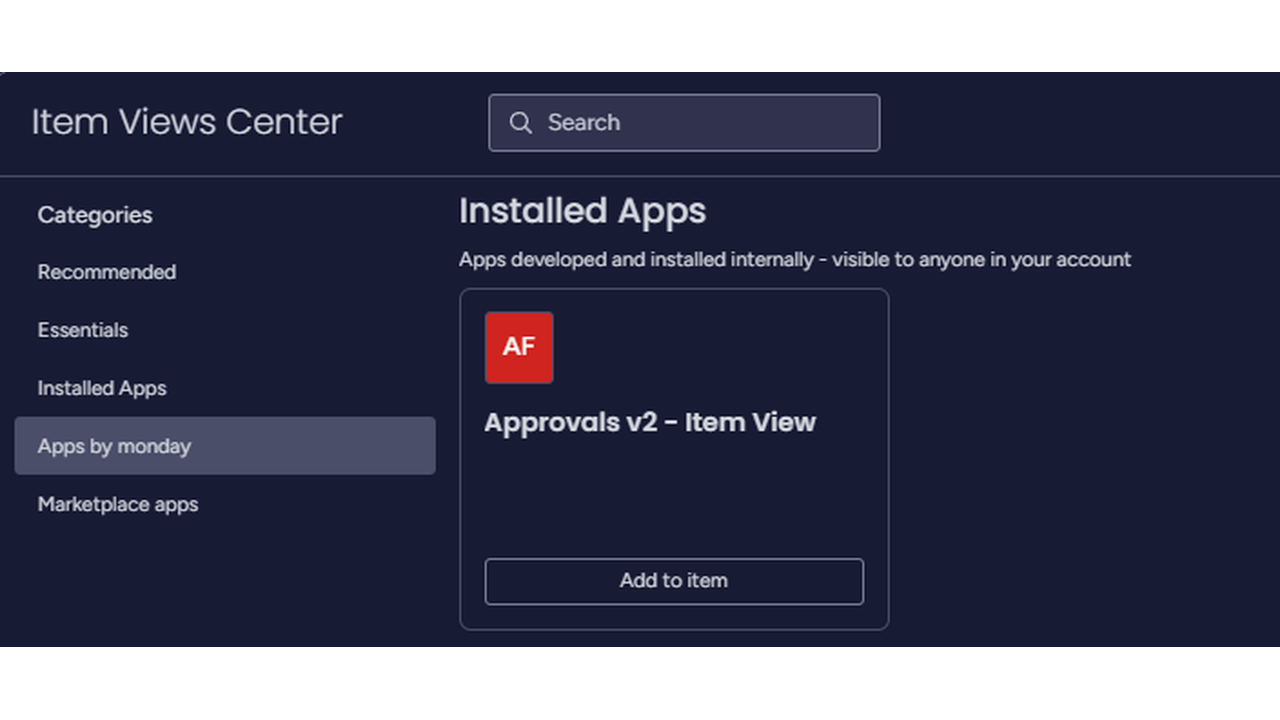
- Open any board, then add the view where you want it:
- Item View — open an item and add Approvals next to Updates. This is where you request and manage approvals for that item.
- Board View — add Approvals from the board’s view tabs (+ → Apps) to see every request on the board in one queue.
2. Submit an approval request
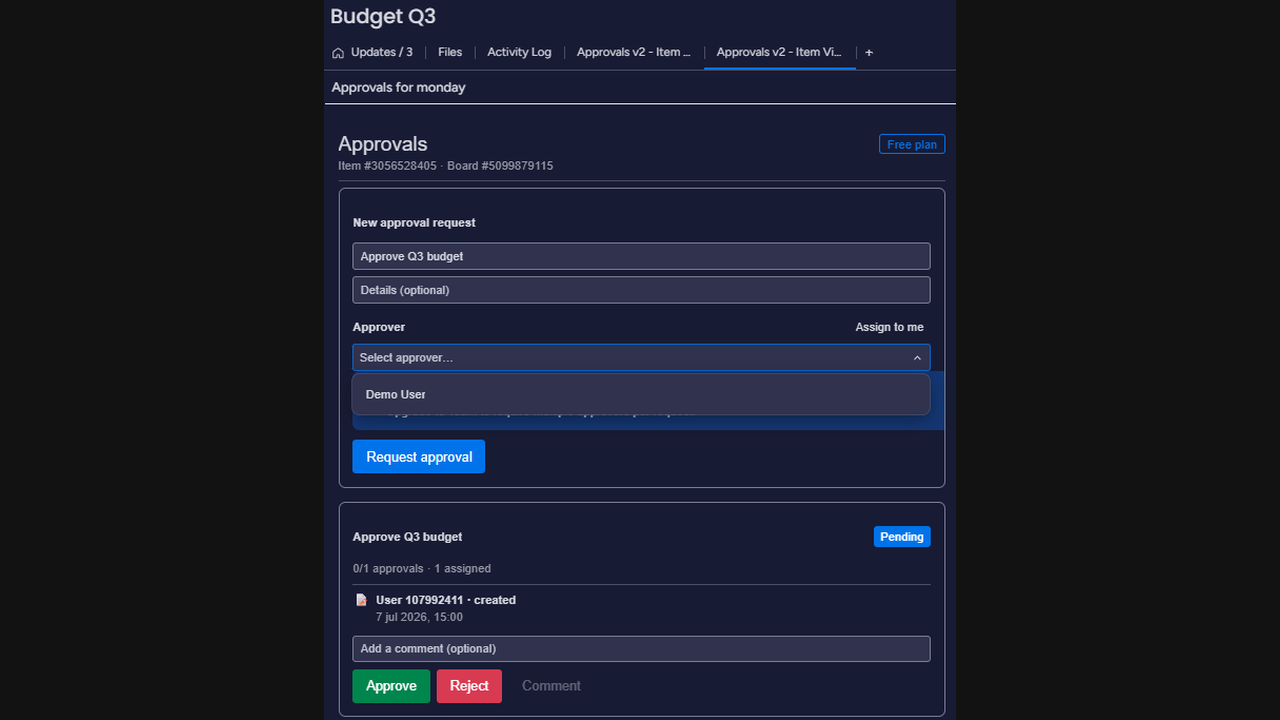
- Open the item that needs sign-off and open the Approvals item view.
- In New approval request, enter a title (what needs approval) and optional details.
- Pick the approver(s) from the people-picker, or click Assign to me.
- On the Pro plan with more than one approver, choose the decision rule — one approval is enough or everyone must approve.
- Click Request approval. A comment is posted to the item’s Updates and each approver is notified.
3. Approve or reject
- Assigned approvers open the item’s Approvals view (or the board queue).
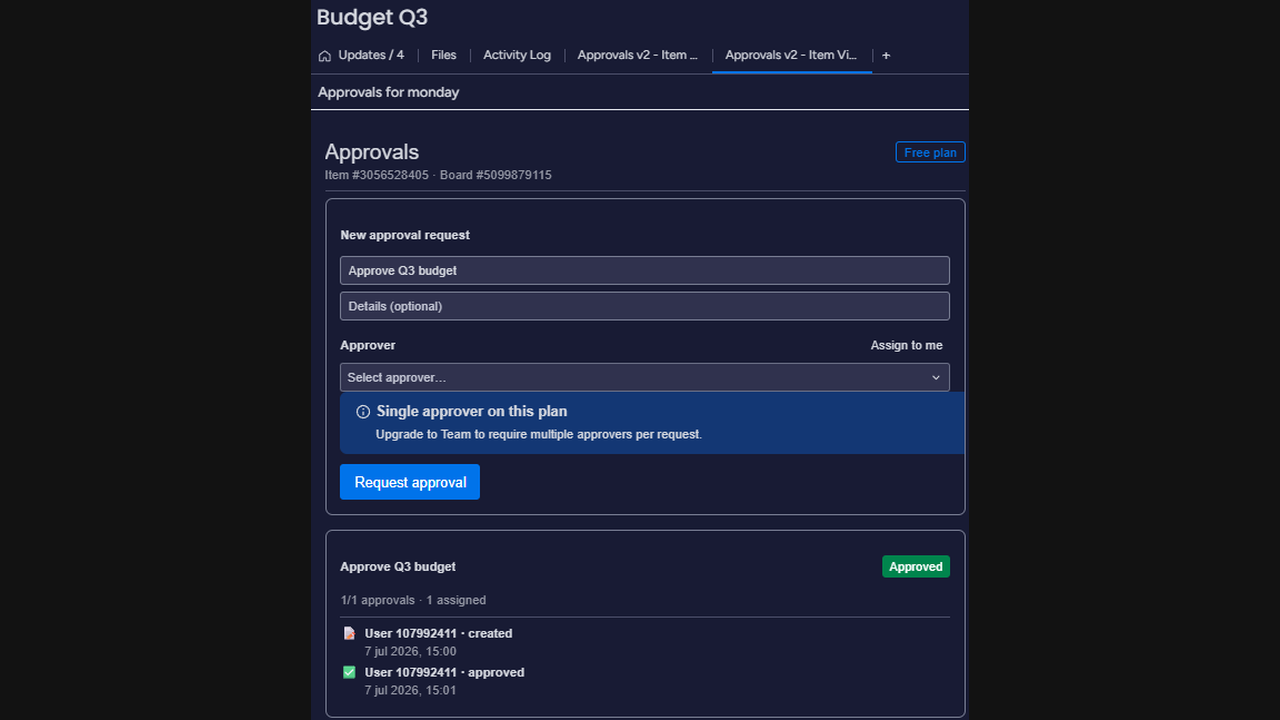
- Optionally add a comment, then click Approve or Reject. Anyone can leave a comment; only assigned approvers can decide.
- The status updates automatically and every action is written to an immutable audit trail (who, when, with which comment). The outcome is mirrored back into the item’s Updates.
4. Track everything in the board queue
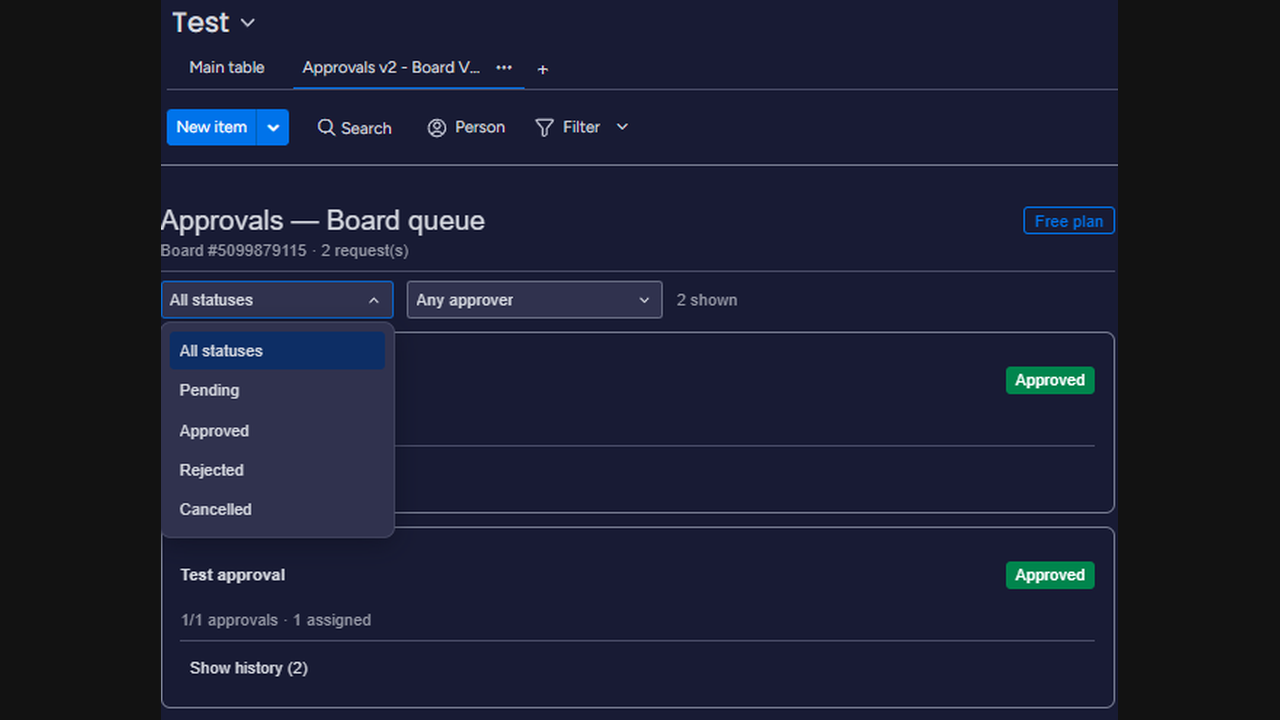
The Board View lists every request on the board. Filter by status (pending / approved / rejected) and by approver, expand any request to see its history, and approve or reject straight from the queue.
5. Pricing
Transparent, published pricing — no hidden tiers. Flat price per account with unlimited seats, metered on active workflows and approval rounds per month. New installs start with a 14-day Pro trial; when it ends you keep using the app on the Free plan.
| Plan | Price | What you get |
|---|---|---|
| Free | $0 | 1 active workflow · 10 approval rounds/mo · unlimited seats · full audit trail · Updates integration |
| Starter | $19/mo | 3 workflows · 100 rounds/mo · audit-trail export |
| Pro | $49/mo | Unlimited workflows · 1,000 rounds/mo · multi-step routing · reminders · delegation |
| Enterprise | $99/mo | Unlimited everything · SLA · priority support · scheduled evidence-exports |
Your plan is enforced securely from monday’s signed subscription — you always see exactly what your plan includes inside the app.
Support
Questions or feedback? Email info@getcompliant.online. See also our Privacy Policy and Terms of Service.